Our Fitting Room blog series delves into the art of modifying patterns to suit individual body shapes. One of the greatest advantages of sewing is the freedom to tailor garments to fit your preferences. It’s all about personalizing the fit to your liking. Today, Lyndsey from the Advisor’s Circle shares her experience adjusting the Strasbourg Henley to better match her unique silhouette.
Sewing Muslins for Knits
I absolutely adore sewing patterns for knit fabrics! Many beginners feel intimidated by knitting, but I find knits forgiving during construction and fitting. Once you overcome the initial learning curve, I believe knits are easier to work with than woven fabrics. Since my weight fluctuates, knits allow me to enjoy my handmade wardrobe for longer periods.
I learned that fitting knits follows the same process as fitting wovens, with the main difference being the muslin stage. You can use any woven fabric to create a muslin for a woven pattern. While the drape might vary from the final fabric, the fit will remain accurate. I’ve experimented with old bed sheets, muslin fabric, and remnants from my fabric collection that no longer aligned with my style.
Creating muslins for knit fabrics demands careful consideration, as many knit fabrics possess varying degrees of stretch. For instance, some knits stretch only horizontally, while others stretch both vertically and horizontally. If you use a highly stretchy knit for your muslin but your final fabric has less stretch, the garment may not fit correctly. Don’t worry—just ensure the muslin fabric closely matches the stretch of your fashion fabric.
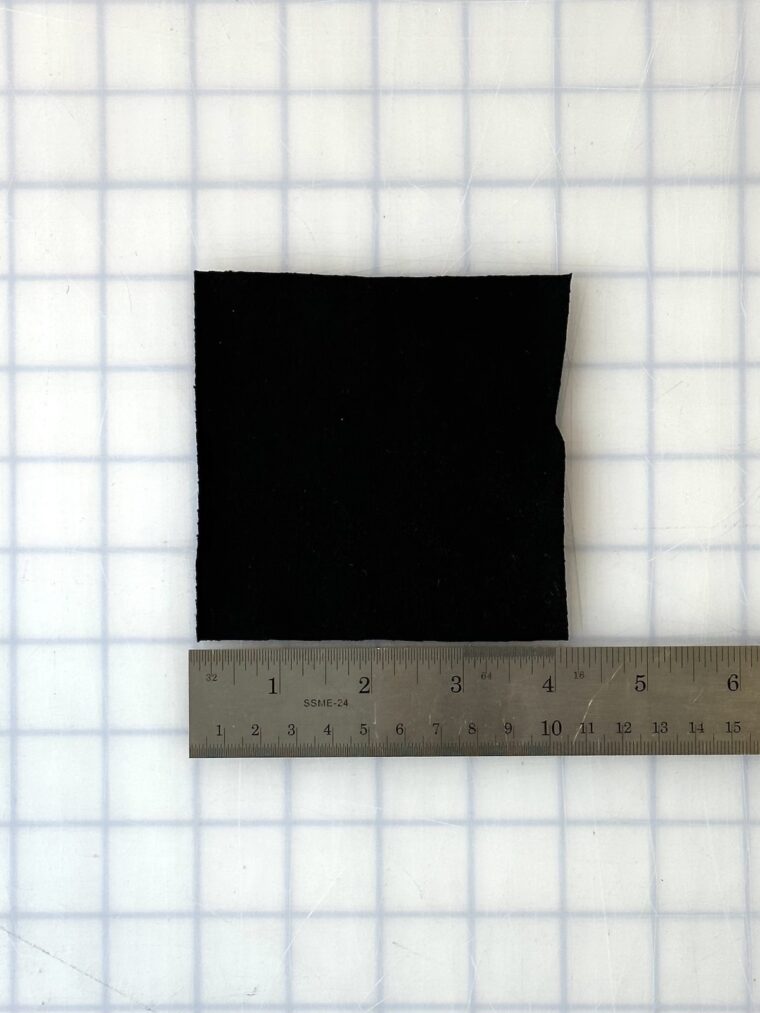
- First, cut a square of your fashion fabric (for example, 4 inches by 4 inches).
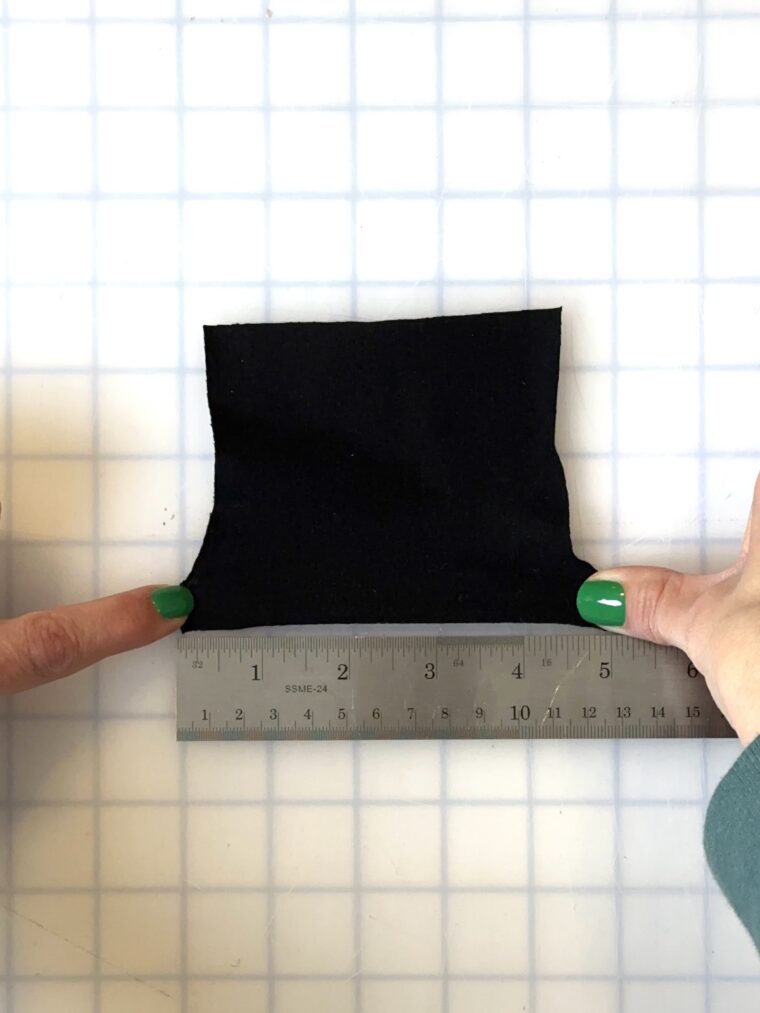
- Stretch the sample square and measure its length when stretched.
- Use this formula to calculate the amount of stretch: (stretched length-original length) divided by the original length multiplied by 100. For example, if a 4-inch by 4-inch square stretches to 5 inches, the fabric has 20% stretch: (5-4)/4 X 100=20%.
- Repeat the process with your muslin fabric. If the muslin fabric has significantly more or less stretch, it won't be ideal for the muslin process. However, if it has about the same amount of stretch, you’re good to proceed!
Fitting Adjustments

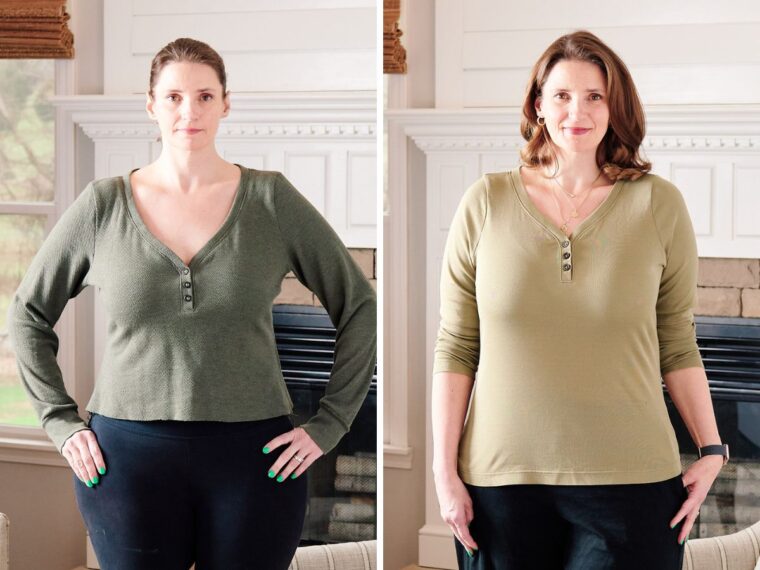
I used a waffle tee from the thrift store for my initial version. I cut version B without any fit adjustments and quickly realized I needed to make changes to suit my proportions and preferences.
As usual, I required high round and forward shoulder adjustments. These modifications are common for me due to my poor posture from prolonged computer use. I completed the high round back and forward shoulder adjustments first, adding 1/2 inch for each adjustment.
Next, I tackled the bodice length. The original length was shorter than what I typically prefer. Before hemming the muslin, the shirt was already cropped. Unsure of how the pattern was meant to fit, I referred to the sample photos to understand the designer’s intention. In the product images, the hem aligns with the top of Liesl’s jeans, indicating this is the intended fit. However, I prefer a longer length, so I added 6 inches to the bodice length.
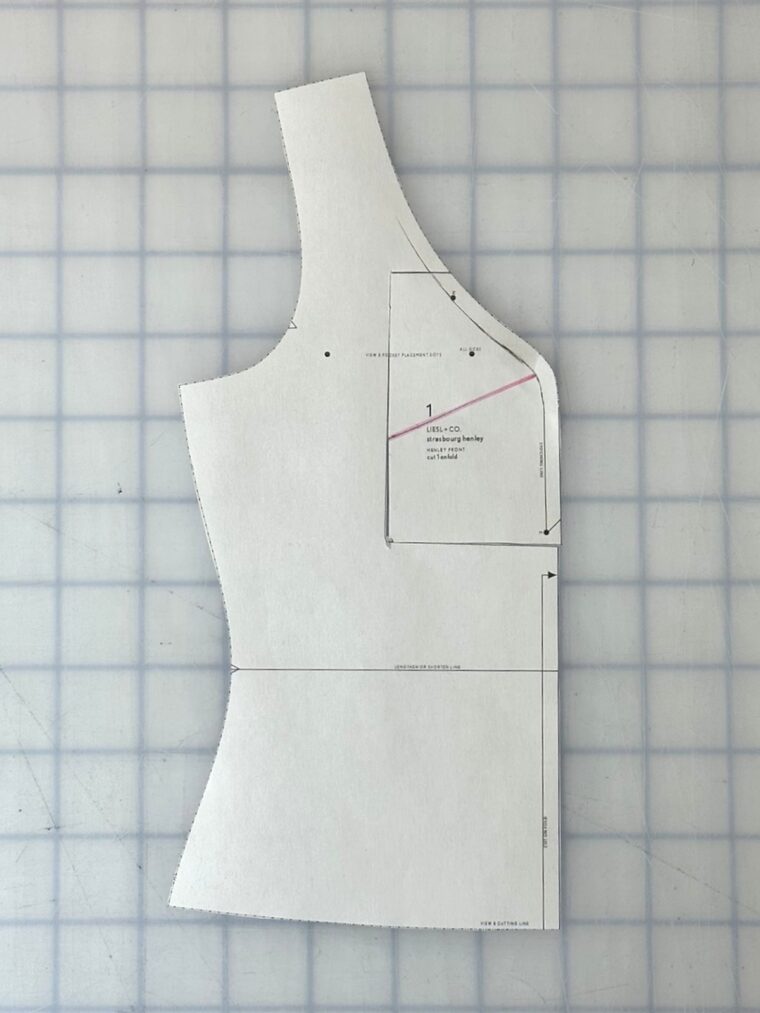
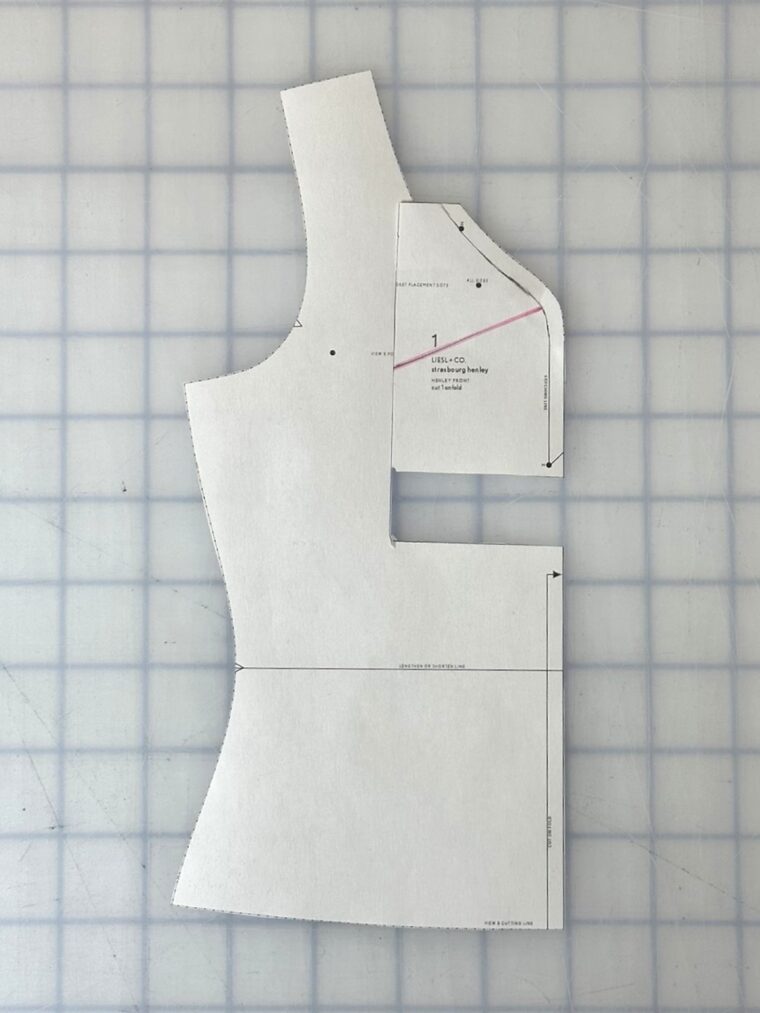
Third, I aimed to raise the neckline. I planned to sew functional buttonholes on the Henley to have the option of wearing the shirt buttoned or unbuttoned. Leaving the original neckline would prevent me from wearing it unbuttoned. I raised the neckline by 2 inches. Unsure of the exact method, I wanted to ensure the pretty curve on the center front remained intact. I used a technique similar to raising or lowering a horizontal bust dart.
- Draw a rectangle around the shaped neckline at the center front and cut out the rectangle.
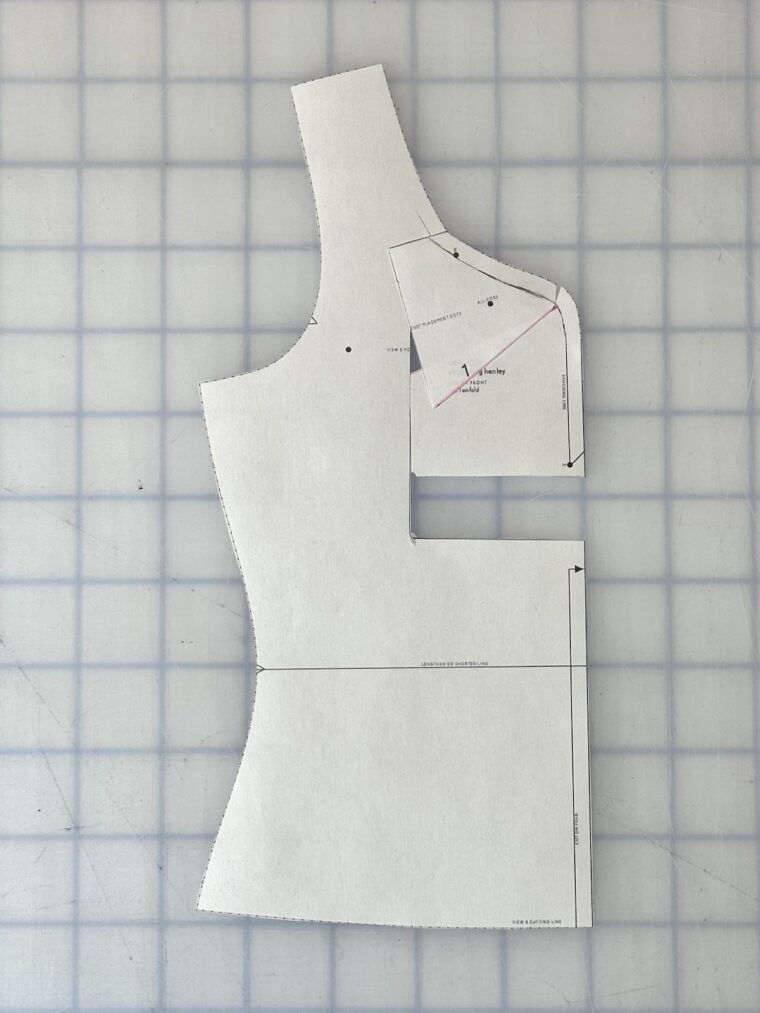
- Raise the rectangle by the desired amount.
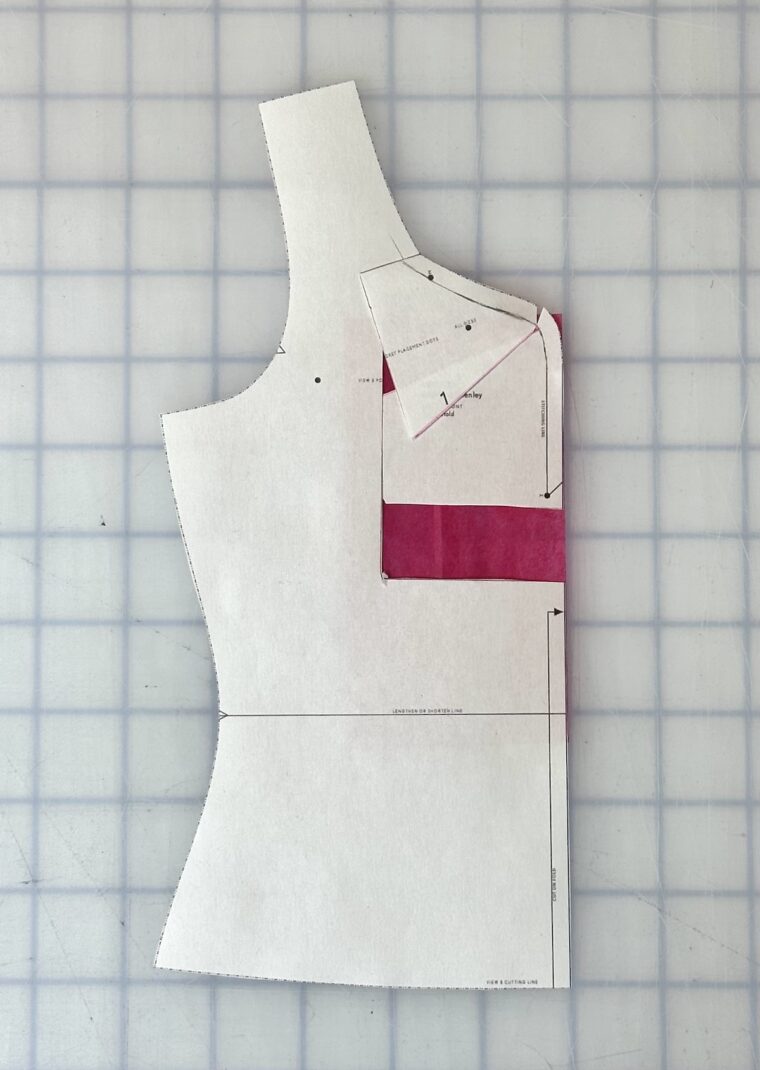
- True up the neckline by slashing a pink line from one side of the rectangle to (but not through) the stitching line. Rotate the edge of the neckline until it blends seamlessly with the original neckline.
- Add paper underneath the open space and tape all pieces together to secure the pattern changes.
Finally, the sleeves were longer than I usually prefer in long-sleeve shirts. I removed 1.5 inches from the sleeve length.
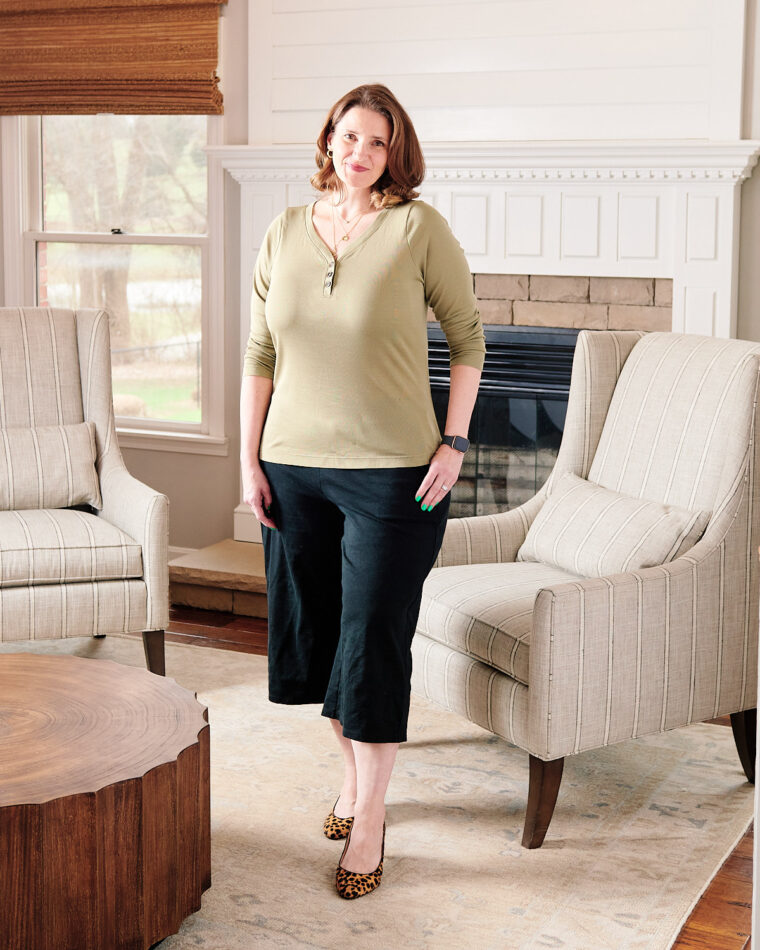
Final Version
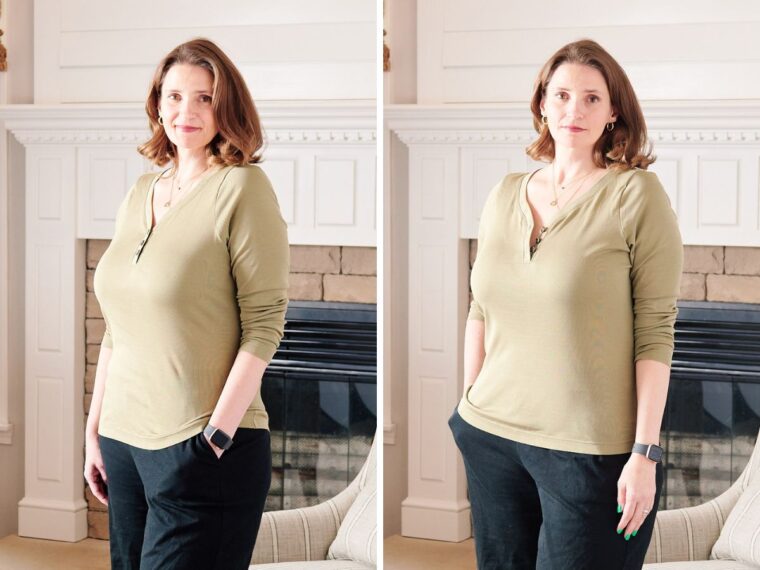
I am thrilled with how the final version turned out!
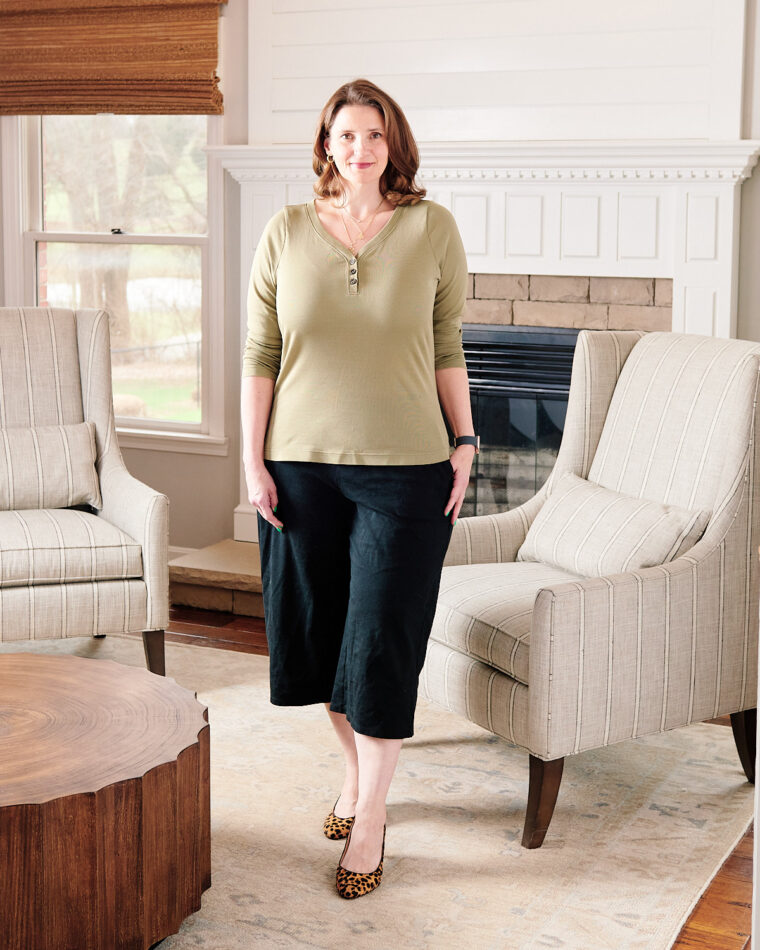
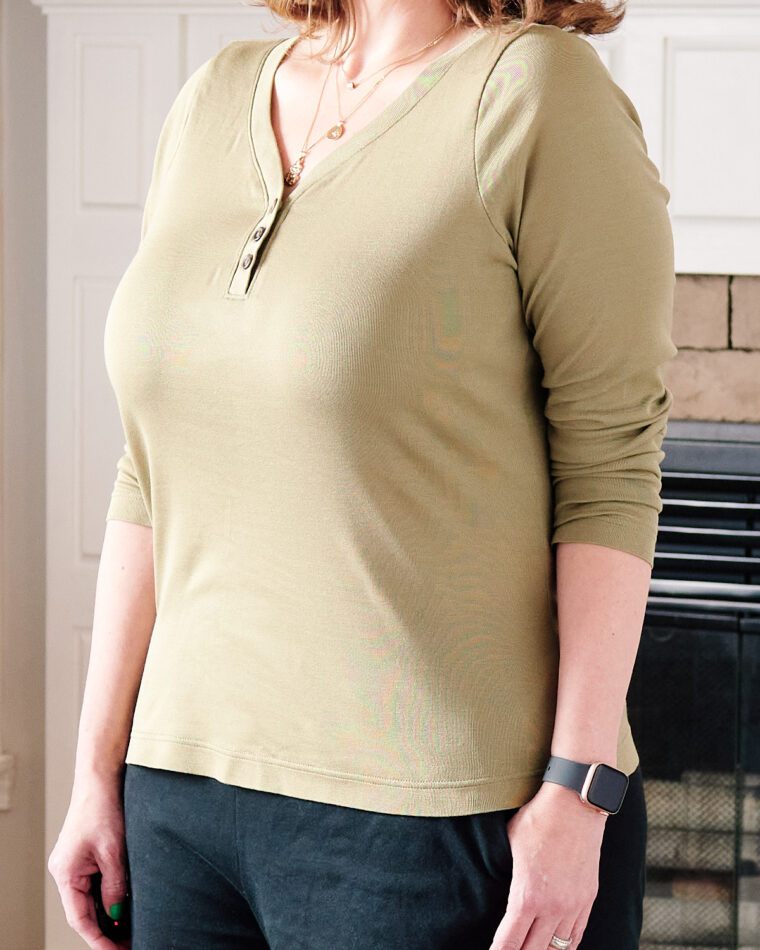
I will most often wear this Henley buttoned-up, but I appreciate the option to unbutton it for a more daring look.
The additional bodice length and raised neckline created a garment that better suits my proportions.
Future Adjustments
I will definitely sew this pattern again and continue refining the fit in future versions. Although I knew better, my fashion fabric for this top had much less stretch than the fabric I used for the muslin. I fitted the pattern while waiting for my fabric to arrive in the mail, and I wish I had waited to do the fitting until I had the fabric in hand.
This discrepancy caused the biggest issue in the sleeve fit. There are two factors at play here: fabric stretch and the need for another adjustment.
You can see the muslin fabric had so much stretch that I initially thought the sleeve was too wide. In the final version, the sleeve is snug. I actually prefer fabric that is in the middle.
Regarding the sleeve fit, I believe I need a broad-shoulder adjustment. You can observe diagonal drag lines sloping up toward the shoulder.
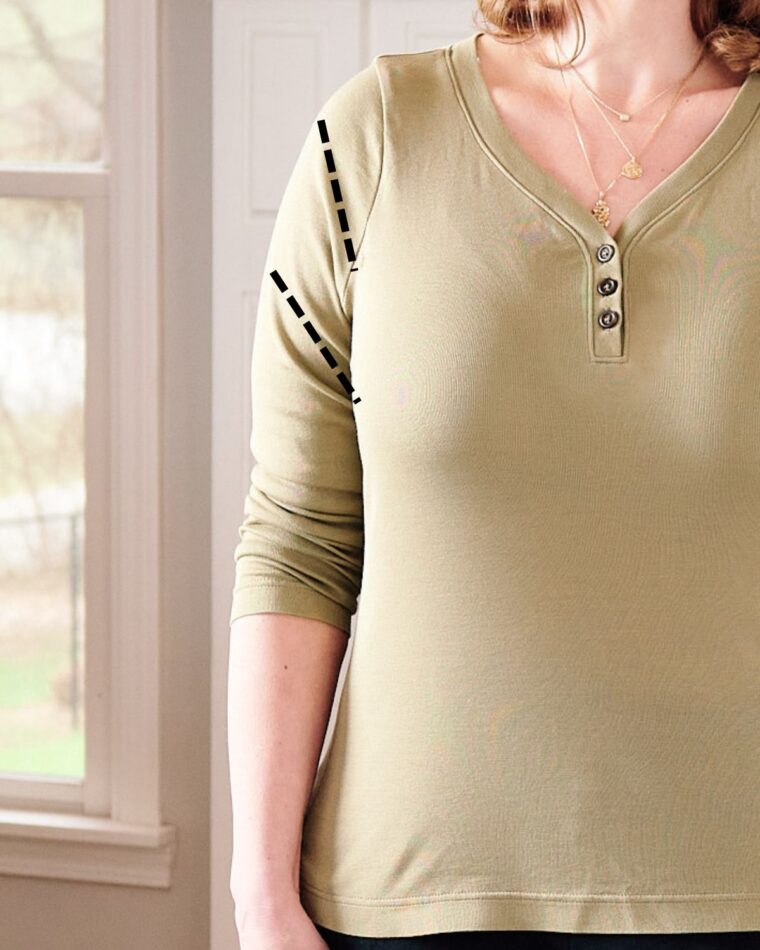
When I notice drag lines like these on a garment, I usually need to raise the sleeve cap or perform a broad-shoulder adjustment. I don’t think the sleeve cap is the issue here. I believe that adding 1/2 inch to the sleeve width will release those drag lines.
It’s challenging for me to explain in words why this would happen, but I hope this picture helps.
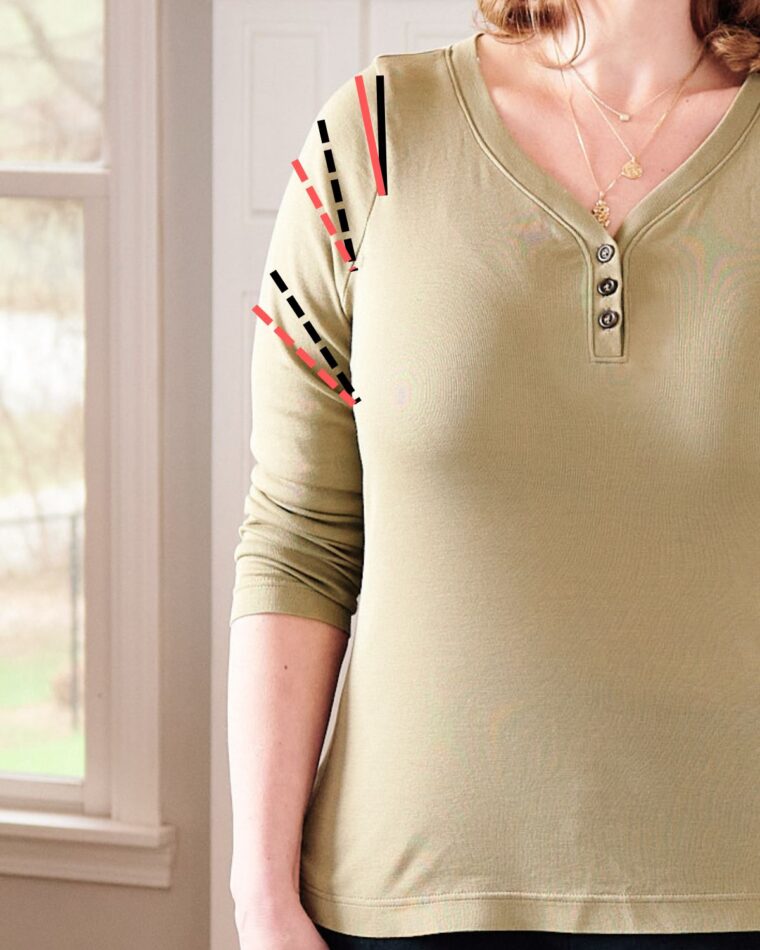
When you broaden the shoulder, the fabric on the outside of the sleeve moves “down,†but the inside of the sleeve (where the sleeve seam lies) stays the same. The black solid line represents the original seamline between the sleeve and the armscye. The red solid line shows the new seamline after the broad shoulder adjustment. Thus, the drag lines (black dashed lines) will begin to level out (red dashed lines).
Another way to think about this: if I removed the stitching on the sleeve above the notches and let the sleeve hang freely, it would naturally fall so that the bicep line is horizontal. The distance between the sleeve stitching line and the armscye stitching line indicates how much adjustment I need for a broad shoulder. Let me know in the comments if you still have questions!
Even though I still have a few adjustments left for this pattern, I love this version! I’ve already worn it several times. It looks great on its own and pairs beautifully with a light jacket for spring.
(adsbygoogle = window.adsbygoogle || []).push({}); Â
Polyester Woman Swimming Short,Boys Swim Shorts,Girls Swim Shorts,Beautiful Lady Swimming Trunks
shaoxing junjia textile co.,ltd , https://www.junswim.com